Bulk Import -Client

If you want to add clients then you can simply Import the client’s details by clicking on Import Clients.

Import Clients
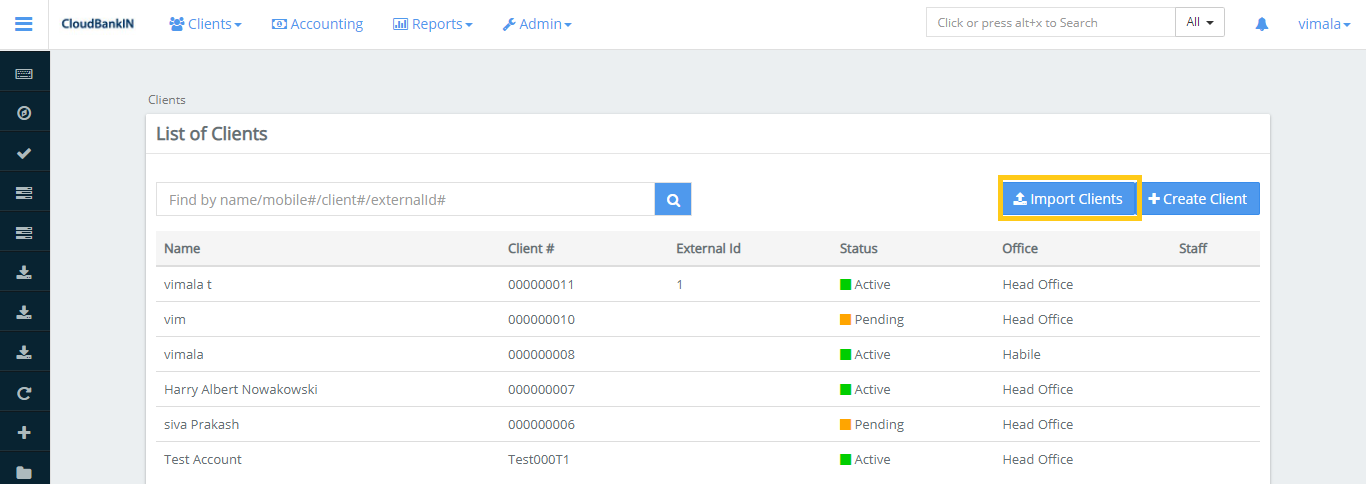
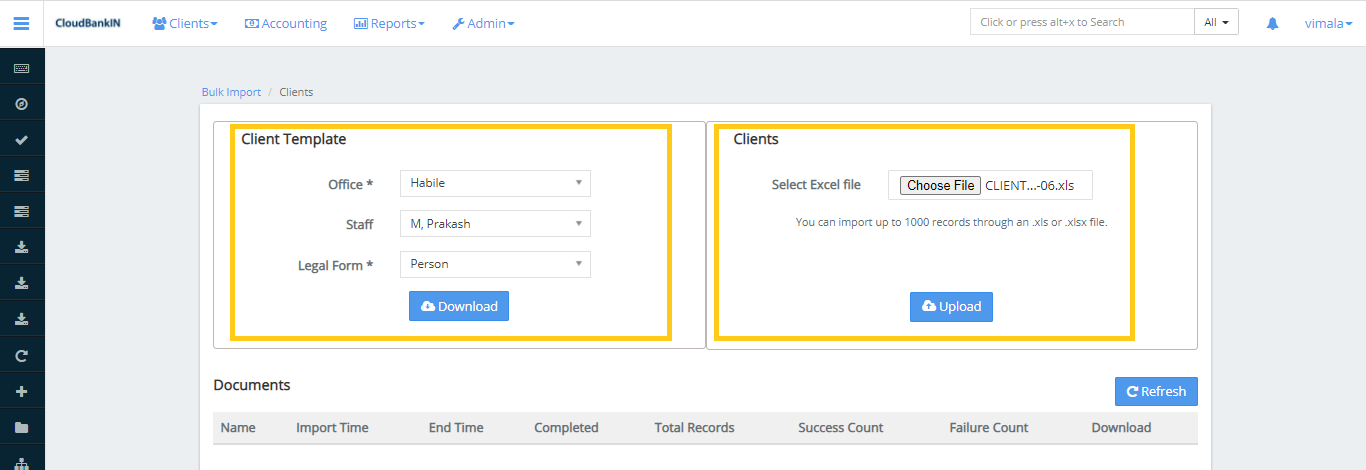
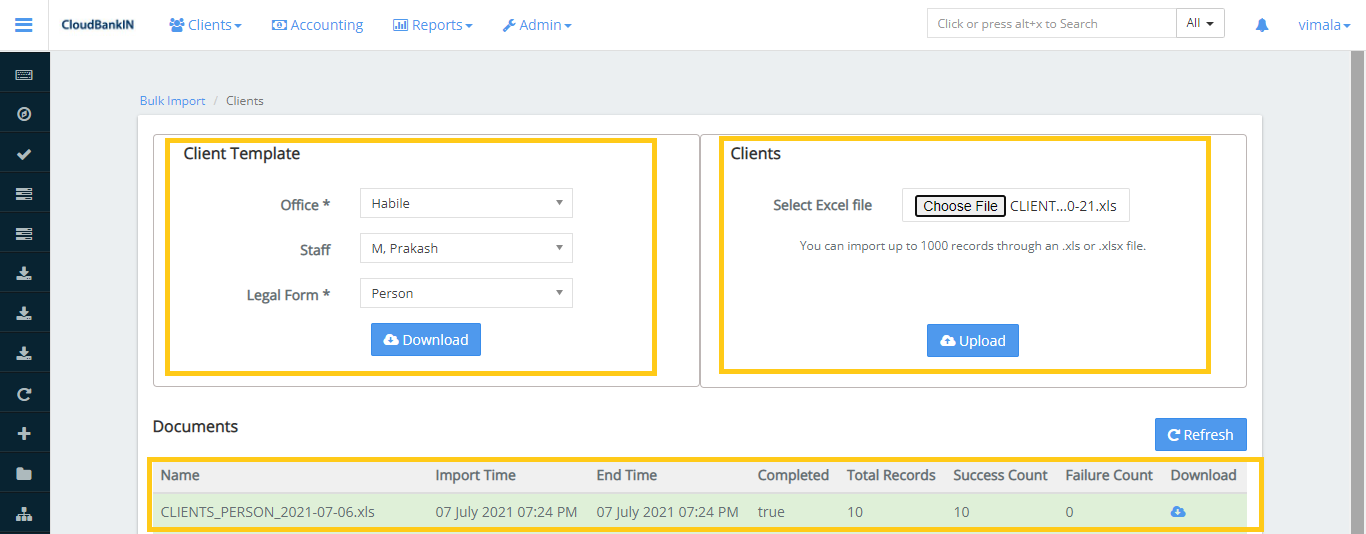
Once you click on the Import Clients, choose the excel file to upload the details. On the left side, you can see the client template. Choose Office as Habile (Your office name) and Legal Form as Personal (Choose as per your requirement). Click on download.
Import Client2
Open the downloaded template and update the client details which you want to Import.
Import Client - Upload
Open the downloaded template and there will be 3 sheets.
  • Client Person – In this sheet, you need to update your Client details to upload
  • Staff – It displays the selected Office Name, as well as the associated Staff List and Staff ID
  • Offices –  It displays the Office name and corresponding Office ID

Field Name & Description

  • First Name(*) – Specify the first name of the client
  • Last Name – Specify the last name of the client
  • Middle Name – Specify the middle name of the client
  • Office Name(*) – Select the Office Name from the drop-down, it displays the office name which you selected while downloading the template
  • Staff Name – Choose the Staff Name from the drop-down. It displays the staff name associated with the selected office
  • External ID – It will automatically display the External ID of the selected staff (e.g, Staff’s reference id for an office/branch)
  • Active(*) – Select the value from the drop-down, True denotes the client is Active, and False denotes the client is Not Active
  • Activation date(*) ( dd/mm/yyyy ) – Specifies the Activation Date of the Client
  • Submitted On Date(*) ( dd/mm/yyyy ) – Specify the application submission date
  • Mobile Number(*) – Specify Client’s mobile number
  • Email Address – Specify Client’s Email Address
  • Date of Birth ( dd/mm/yyyy ) – Specify Client’s Date of Birth. It should be in the specified date format
  • Client Type – Choose the client type from the drop-down
  • Gender – Choose the value from the drop-down
  • Client Classification – Select the Person’s Classification from the drop-down
  • Is Staff? – Select the value from the drop-down, True denotes the client is your staff and False denotes the employee is not your staff
  • Address Enabled(*) – Choose the value from the drop-down, True denotes the address is active, and False denotes the address is not active
  • Address Type(*) – Select the address type from the drop-down
  • Street(*) – Specify the street name of the client
  • Address Line 1,2,3 – Specify the address of you are client
  • City – Specify the City of your Client
  • Postal Code(*) – Specify the postal code of the client. It should be the correct value
  • Photo – Upload any one of the borrower documents (i.e, Aadhar). It should be a unique value, you cannot add the same details to other clients
  • Passport – Specify the Passport number of the client. It should be a unique value, you cannot add the same details to other clients
  • ID – Specify any unique id of the client (i.e, Pan). It should be a unique value, you cannot add the same details to other clients
  • Drivers License – Specify the driving license number of the client. It should be a unique value, you cannot add the same details to other clients
  • Any Other Id Type – Specify if you have another unique client id. It should be a unique value, you cannot add the same details to other clients
  • Aadhaar – Specify the aadhaar number of the client. It should be a unique value, you cannot add the same details to other clients
  • Pan – Specify the pan number of the client. It should be a unique value, you cannot add the same details to other clients
  • VoterID – Specify the voter id of the client. It should be a unique value, you cannot add the same details to other clients
  • NationalIDCard – Specify the national id card number of the client. It should be a unique value, you cannot add the same details to other clients
  • RationId – Specify the ration id of the client. It should be a unique value, you cannot add the same details to other clients
Client - Import Data
Click on Choose File and select the updated template to Import the details.
Client Import

Once the data is Imported you can see the clients in the View Client form.

List of Clients