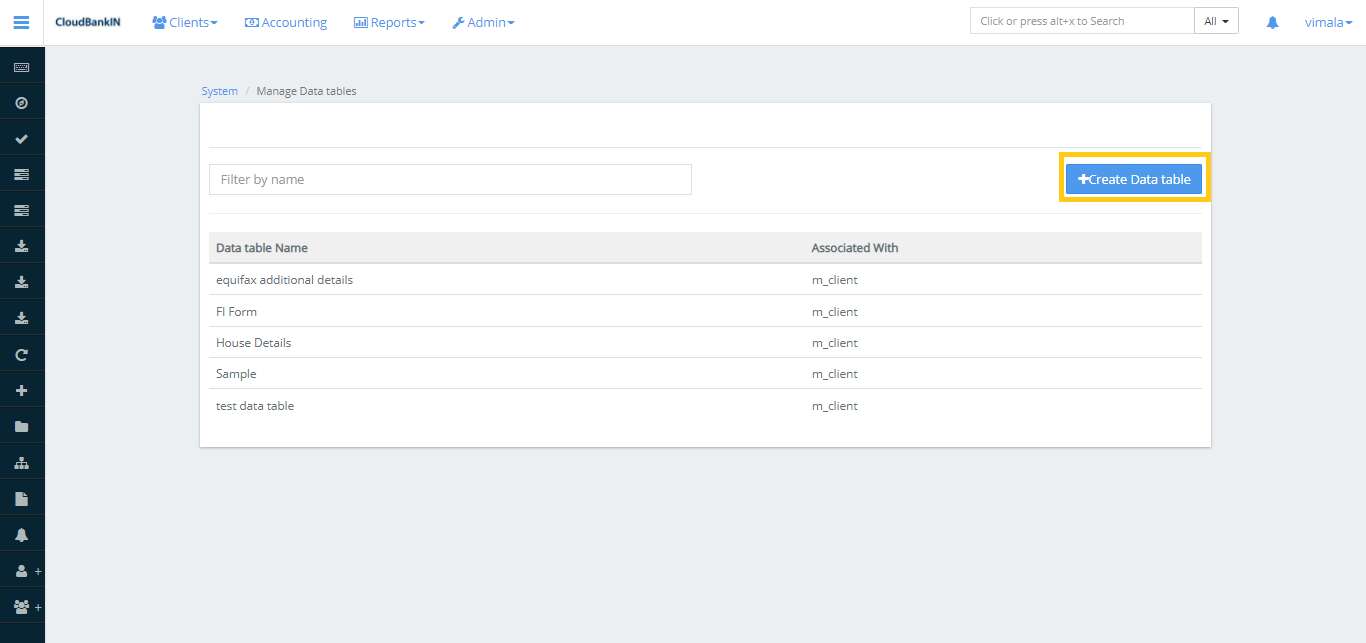
In the Manage Data Tables User can add custom fields to a Client Profile, Loan Account, or Office, etc.,
For Example, If you want to add any additional fields you can add them here.
Click on Create Data Table.
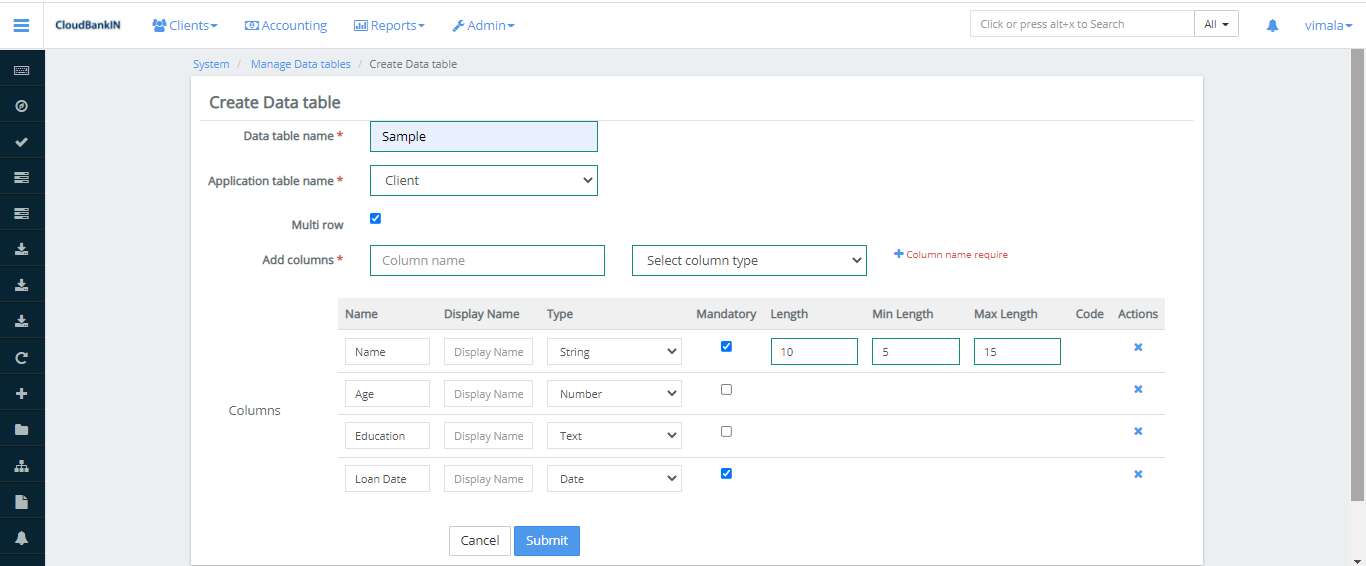
In the Data Table form update the Mandatory details.
Field Name and Description
Data Table Name (*) – Enter the Data Table Name
Application Table Name (*) – Select the value from the drop-down for which the new data table will work
Multi row – Select the checkbox if you want to add more than one entry
Add Columns – You can specify the column name you want to add and select the condition for the corresponding column(i.e, the column type is String, Number, Decimal, Date, etc.,)
If you want to add the field click on + and Submit it
Type and description
String – Allows the values that contain string values ( e.g, Name, Address, etc.,)
Number – Allows the values that contain numbers ( e.g, Age)
Decimal – Allows the values that include decimal ( E.g, Interest rate, Income)
Date – Allows to enter the value contains Date format (E.g, Date)
Text – Allows the information about the person or business (E.g, Person Information)
Drop-Down – Allows the user to select the data from a drop-down (E.g, Relationship, Gender, etc.,)
You can select the checkbox if you want the field to be mandatory.
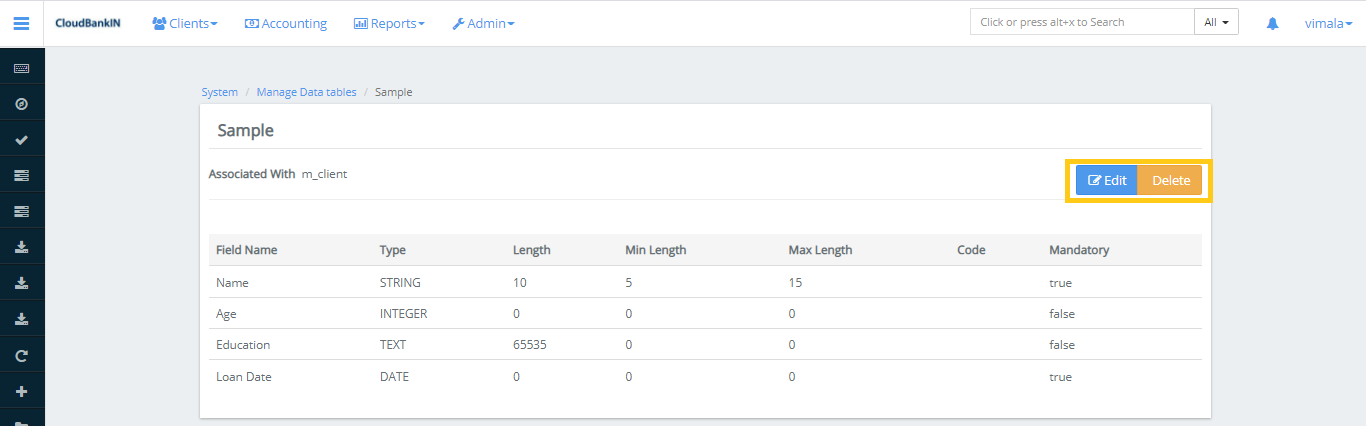
Once you click on Submit it will show the preview of data where you can Edit or Delete the data.
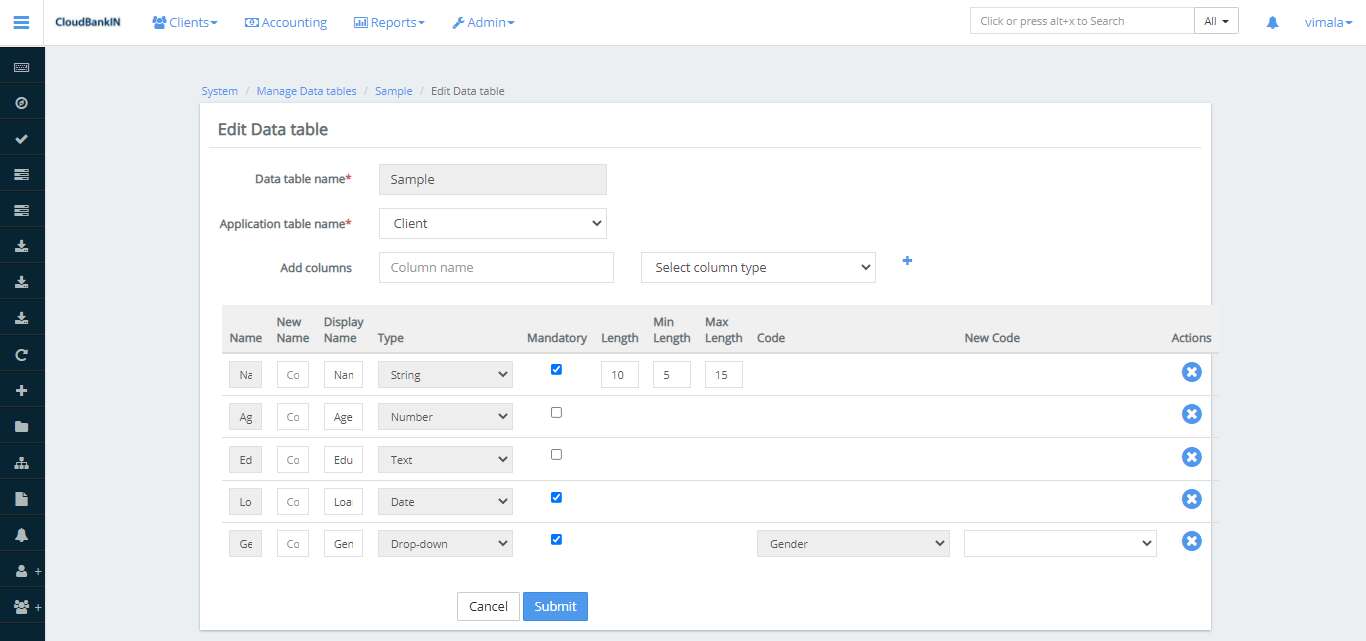
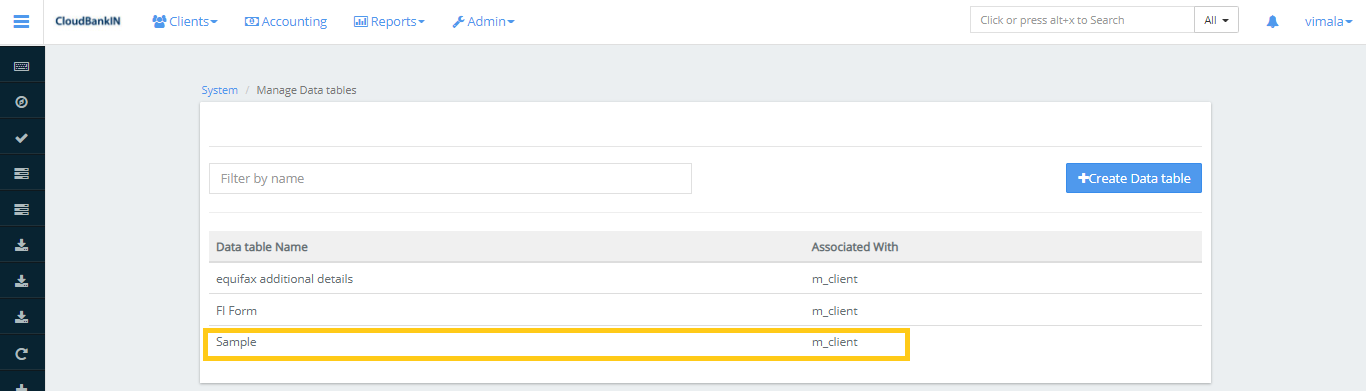
In the Manage table data, you can see the Data Tables. You can edit or delete the data by clicking on the name.
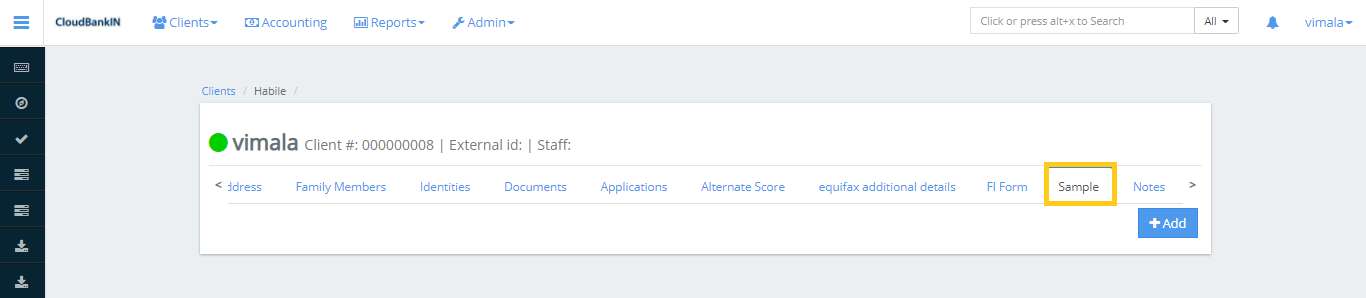
Added Code and their value will be displayed in the Client form( As you selected earlier).
Click on Add button to update the details.
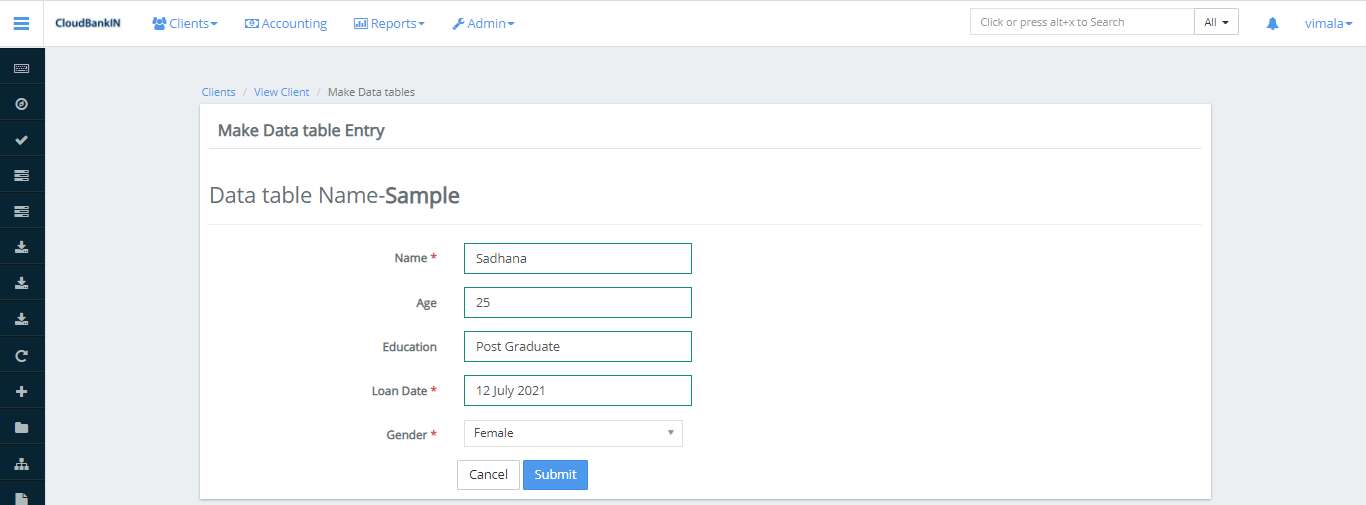
Once the information has been updated, click Submit.