Maker Checker requires a creator and approver to complete a specific work. One person creates the application and the other person should verify and approve the application.
Before starting with the Maker Checker task, the Maker Checker option should be enabled in GlobalConfiguration.
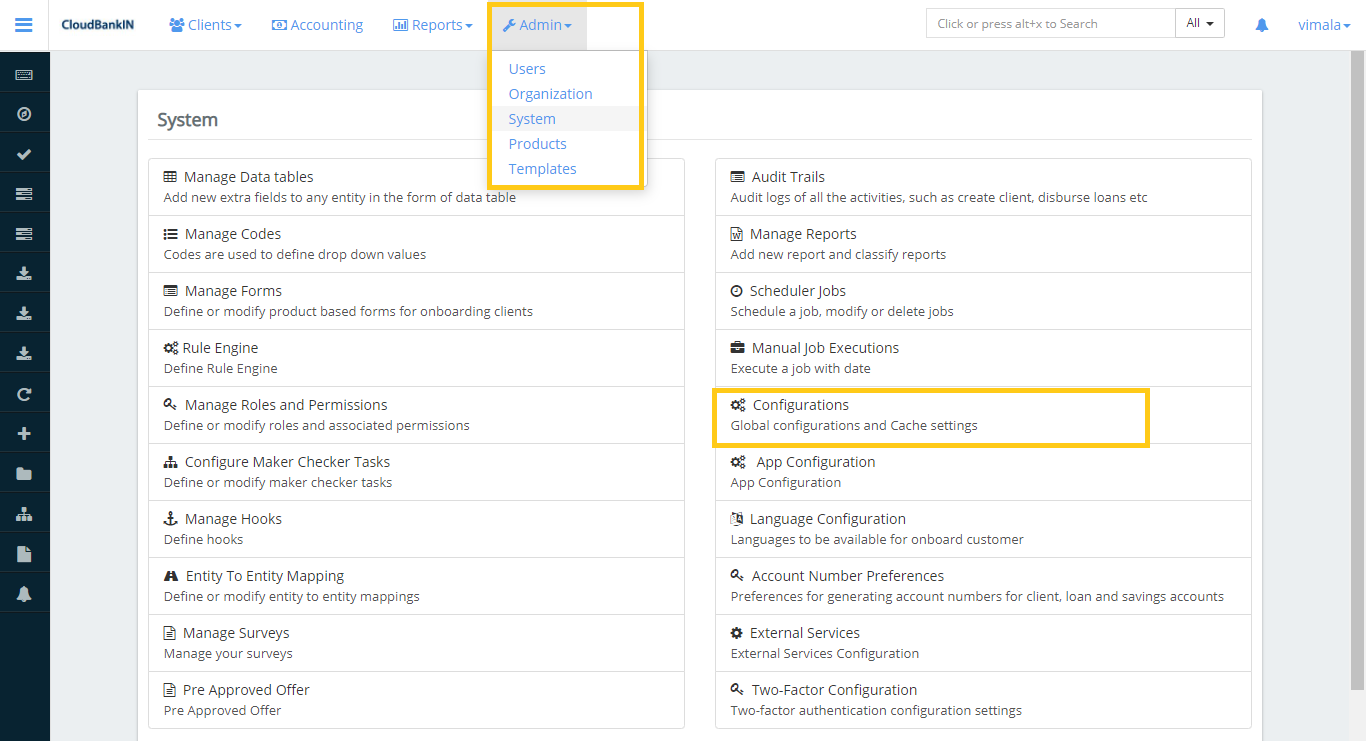
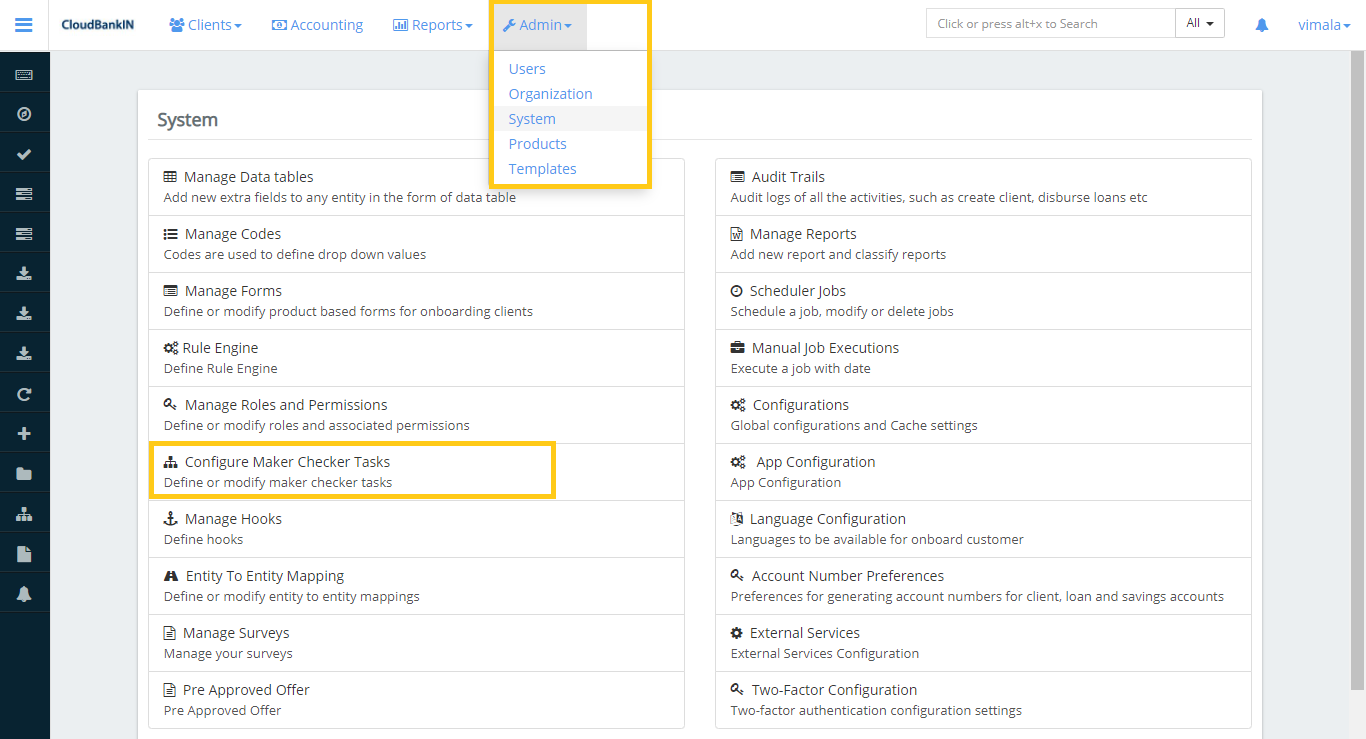
Go to Admin ->> System ->> Configure Maker Checker Tasks.
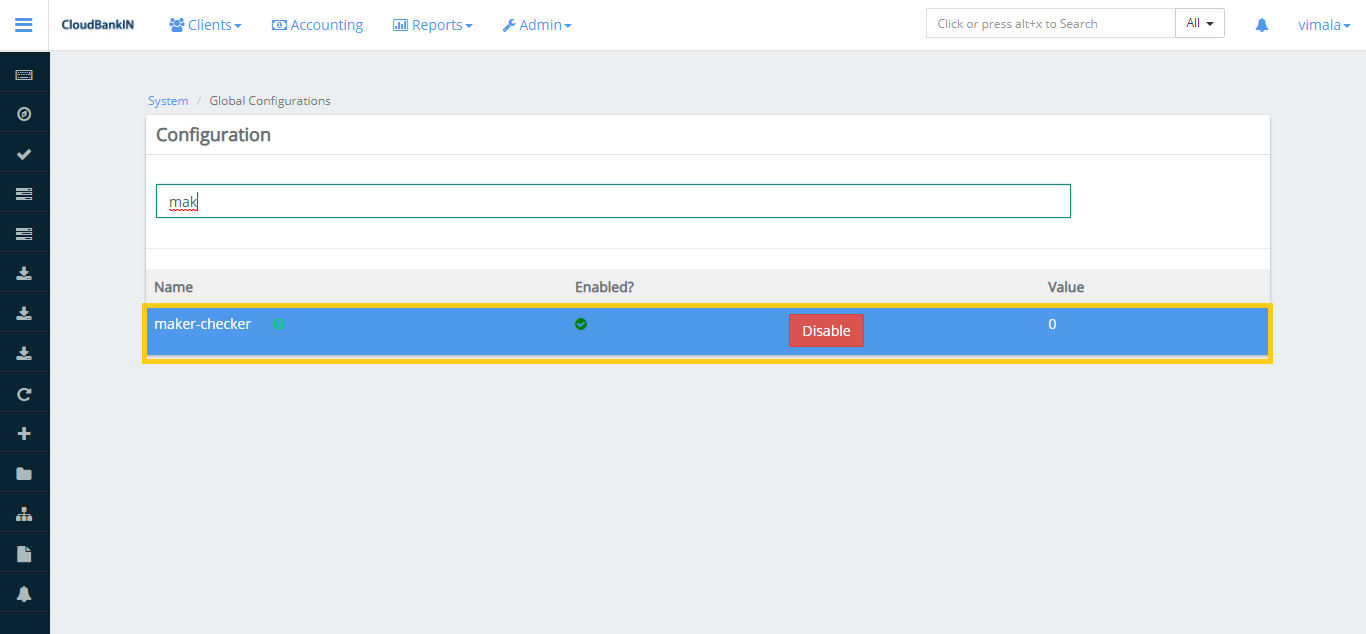
Search for Maker Checker in the search option and enable it.
Go toAdmin ->> System ->> Configure Maker Checker Tasks.
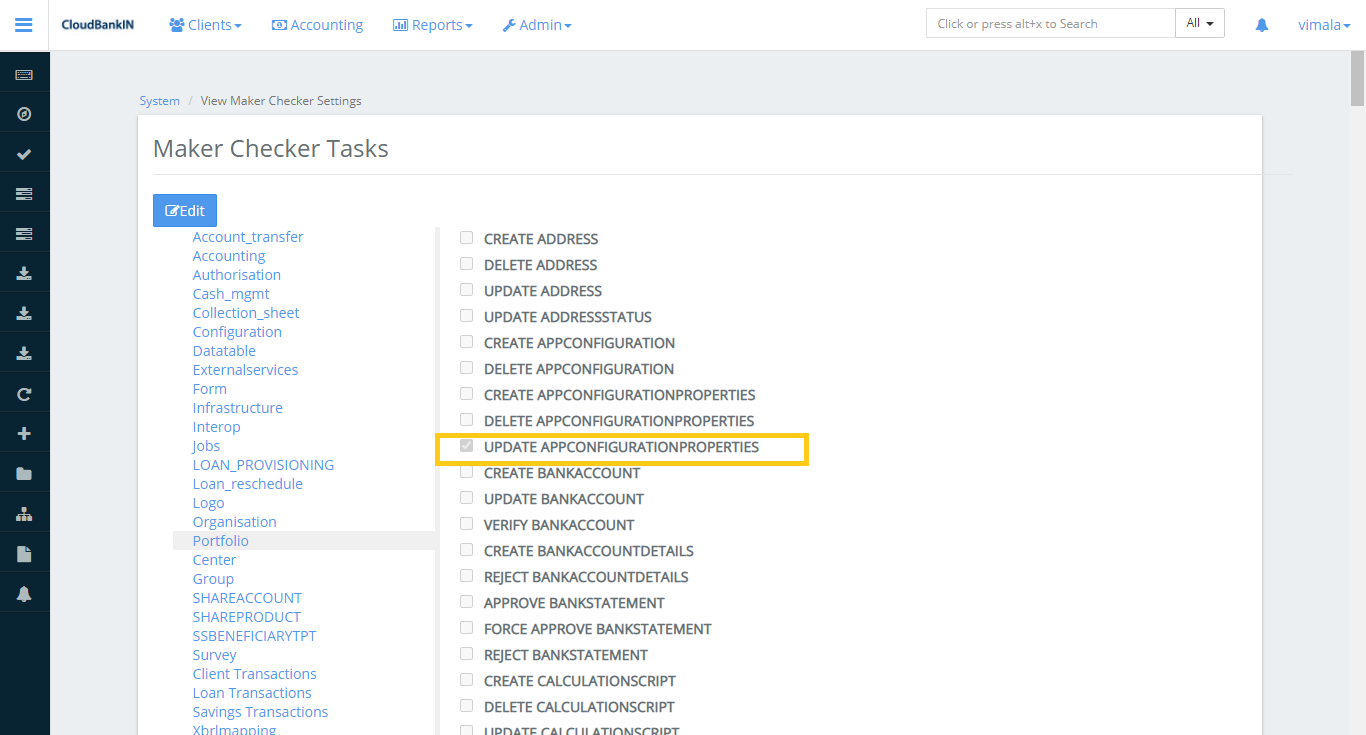
Once you click on the Configure Maker Checker Tasks, it will show the list of existing Maker Checker Tasks.
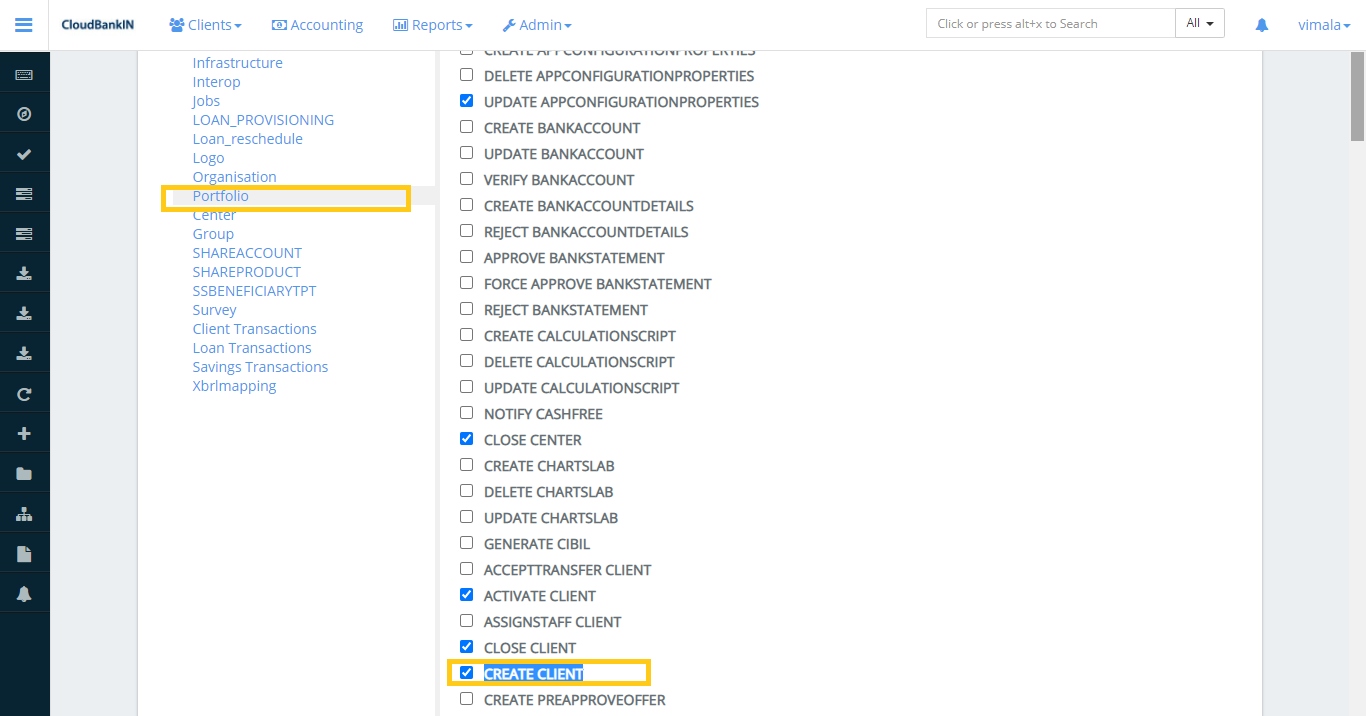
If the user wants to add or remove the task, click on the Edit button and select the required task or unselect the task if not required.
For Example, Select Portfolio and select Create Client, then clickSubmit.
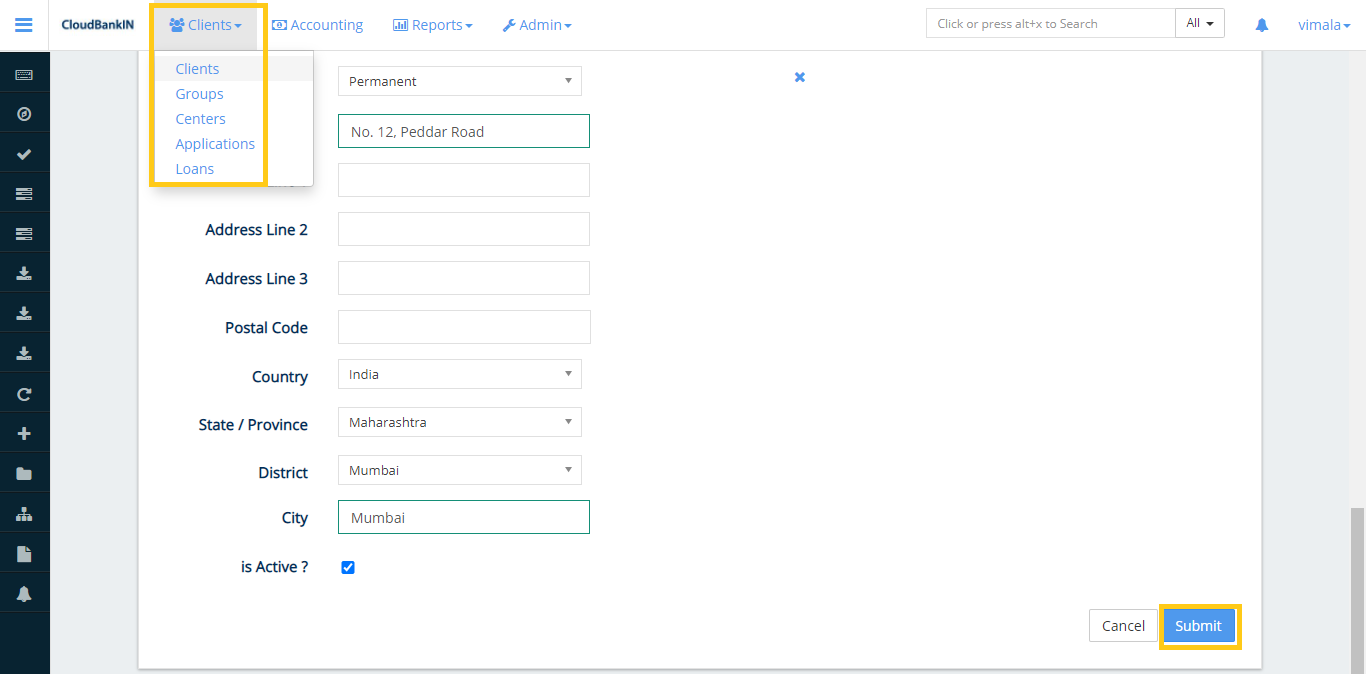
Now try to create a Client and Submit it.
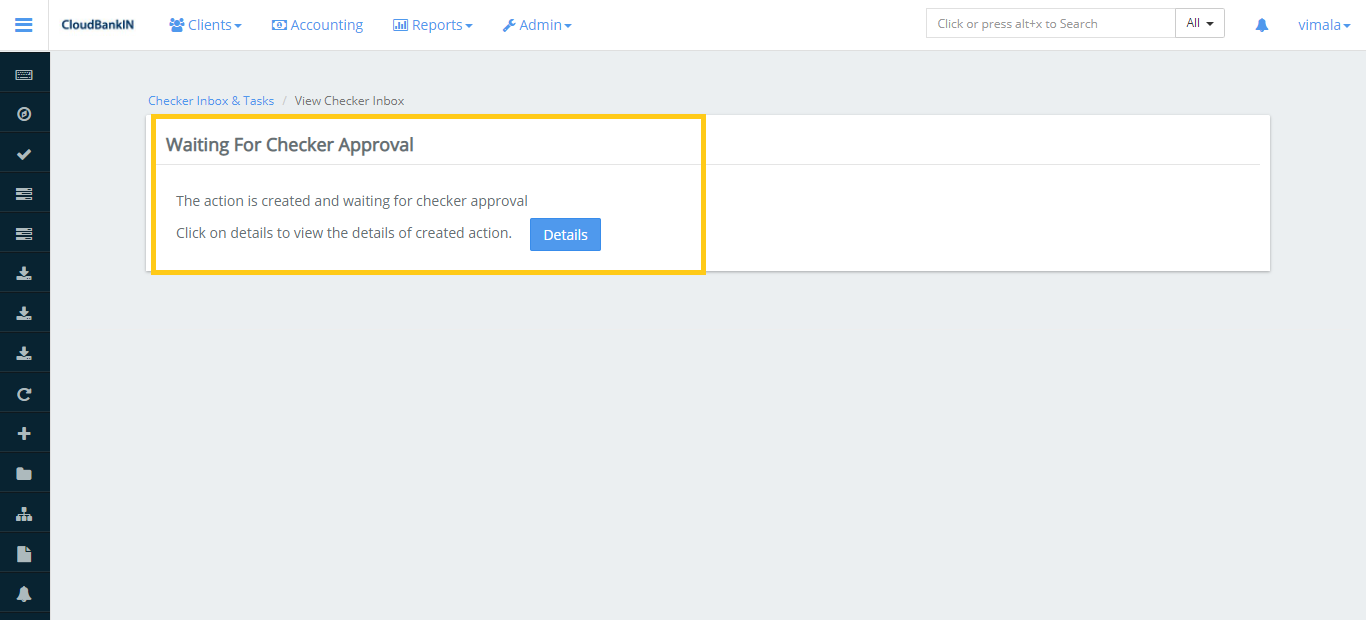
It will ask for Approval from the second person to Submit this Client’s details.
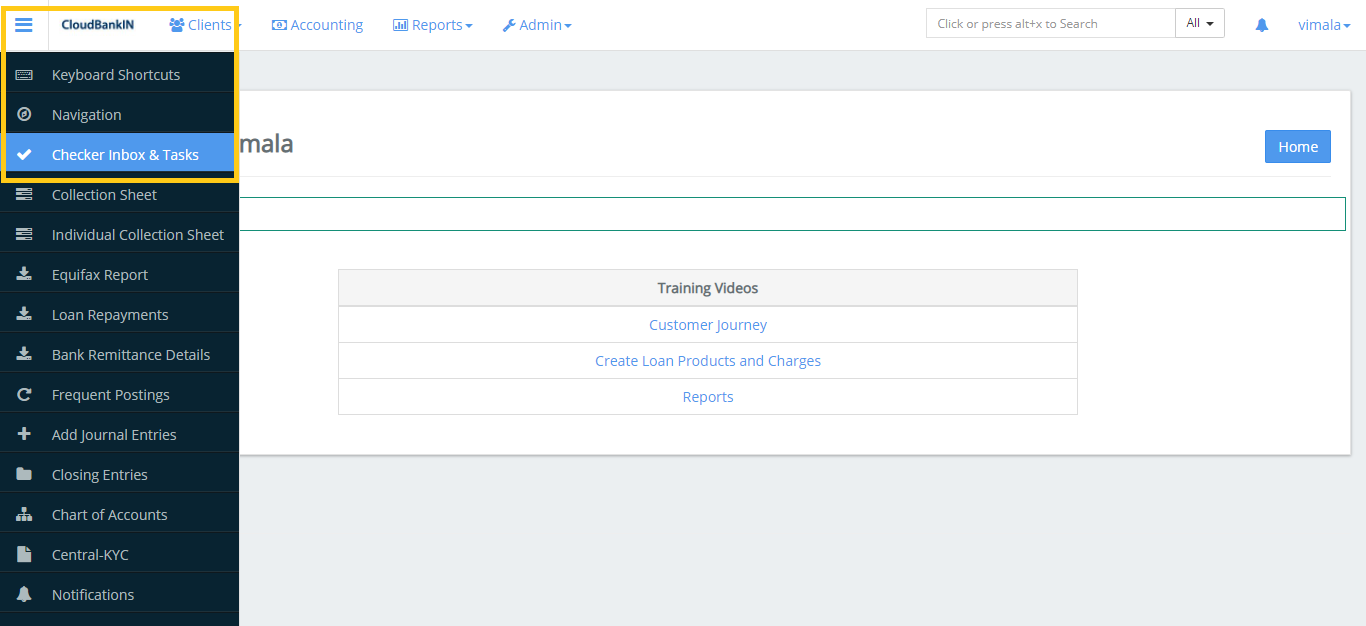
Go and select Checker Inbox & Tasks, from the shortcuts on the left side of the CloubBankIn Page.
On the Checker Inbox & Tasks page, it will show the client details below the Checker Inbox and in the Respective Tabs for approval.
Click on the client to view the details. By checking the information the approver can Approve, Delete or Reject the particular client.
The client will be added to the CloudBankIn system and listed in the List of Clients once it has been approved. This application can now be processed by the first person.